A Quality Inspector’s 6-Step Checklist for Choosing Solar Mounting Systems (and Avoiding Costly Surprises)
2026-07-06 / Renata Silva
-
When to Use This Checklist
-
Step 1: Verify Mounting‑System Compatibility with Your PV Modules
-
Step 2: Inspect Tooling and Bending Requirements
-
Step 3: Match the Electrical System – Inverters, Storage, and Surge Protection
-
Step 4: Evaluate Total Cost of Ownership (Not Just Unit Price)
-
Step 5: Confirm Certifications and Test Reports
- Step 6: Plan for Installation & Safety (Including the Powerwall 3 Myth)
When to Use This Checklist
If you’re an installer, EPC, or project developer sourcing mounting systems for commercial or utility-scale solar projects, this checklist is for you. It’s designed for those moments when you’re comparing multiple vendors or evaluating a new product line—especially when the procurement team is pushing for the lowest quote. Use it to verify specs, uncover hidden costs, and avoid the rework that kills margins.
I’ve broken it into six steps. Each step has a concrete check point. Follow them in order, and you’ll have a structured way to assess any mounting system (or its companion components) before you commit.
Step 1: Verify Mounting‑System Compatibility with Your PV Modules
You’d be surprised how often this gets glossed over. People assume that if a mounting system supports the same panel size, it’s fine—but there’s more to it.
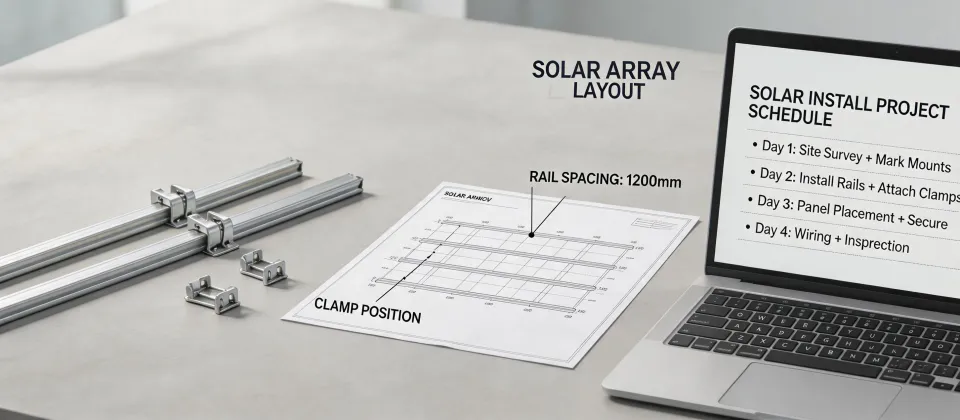
- Check the rail-to-frame clamps: Some systems use specific clamp widths that don’t work with frameless or thin‑frame modules. Get the exact clamp spec and test it on a sample panel.
- Confirm the grounding method: Is it WEEB‑style clips, a bonding wire, or integrated? If the system uses WEEBs, verify they’re compatible with your panel’s frame coating. (I once rejected a batch because the WEEB tines couldn’t bite through the anodized surface—took us three weeks to reorder.)
- Cross‑check mid-clamp and end-clamp tolerances: Most manufacturers provide a “module thickness range.” Don’t just read the range—test the actual panel thickness at the clamp point. Some panels have tapered frames that cause uneven clamping pressure.
Quick reality check: “From the outside, it looks like any standard mounting system will work with any standard panel. The reality is frame profiles vary, and a 0.5 mm mismatch can cause micro‑cracks over time.” (that’s a surface‑illusion element)
Step 2: Inspect Tooling and Bending Requirements
Mounting systems for flat roofs and ground‑mounted arrays often require on‑site bending of rails or busbars. If you’re deploying a hydraulic busbar bending machine, make sure it’s compatible with the system’s rail profile.
- Hydraulic busbar bending machine: Get the exact die set needed for the rail channel. Many generic machines can’t handle the tighter radii of some premium rails. If you already own a machine, ask the vendor for a test bend sample (or order a dummy rail length first).
- Winch‑based tension systems: For ground‑mounted arrays with wire‑rope or tension‑cable designs (often used in carports or pitched ground mounts), check that the integrated D‑rings or attachment points match your winch mounting systems. I’ve seen installers try to rig a standard winch onto a D‑ring that was rated for 20 kN when the actual load was 35 kN—that’s a failure waiting to happen.
Put another way: don’t assume your existing tools will work. Get a dimension drawing and run it against your inventory. If in doubt, ask the supplier for a compatibility matrix.
Step 3: Match the Electrical System – Inverters, Storage, and Surge Protection
Photovoltaic mounting systems aren’t just mechanical; they integrate with inverters, storage, and BOS components. A mismatch here can derail commissioning.
- 48 V hybrid solar inverter compatibility: If your project uses a 48 V hybrid inverter (like a Sol-Ark or Deye), confirm the mounting system’s DC bus bar or combiner box has enough fuse holders and wire‑way clearance for the inverter’s input strings. (I recall a project where we had to add an external combiner box because the integrated one was only 12‑position and the inverter required 16 —that added $800 in materials and 2 days of labor.)
- Battery storage integration: When battery packs are mounted on the system (e.g., wall‑mount or floor‑mount), check that the brackets/rack are rated for the battery weight and that cable routing doesn’t interfere with the mounting rails. And never assume you can open a sealed battery enclosure—like a Tesla Powerwall 3—unless you’re a certified technician. The Powerwall 3 has proprietary bolts and internal voltage standing at 380 VDC; opening it without training can void the warranty and create serious safety hazards.
- Surge protectors and disconnects: Ensure the mounting system’s accessory kit includes enough space for inline surge protectors (typically Type 2 per IEC 61643‑31) and that the DC disconnect is within reach.
Step 4: Evaluate Total Cost of Ownership (Not Just Unit Price)
This is where the value‑over‑price stance kicks in. I’ve personally reviewed 200+ unique product specs each year for the last six years, and the cheapest quote becomes the most expensive choice in about 40 % of cases. Here’s what I look for:
- Hidden setup fees: Some vendors charge for custom die‑cutting, special anodizing colors, or non‑standard rail lengths. A $0.15/watt system might have $0.03/watt in add‑ons.
- Shipping and lead time: A system that’s 7 days cheaper but takes 20 days to ship? If you’re on a tight timeline, that “cheaper” option causes liquidated damages. I’d rather pay 10 % more for a vendor that stocks local inventory.
- Replacement part costs: Ask for a pricelist of individual components (clamps, end caps, grounding hardware). A system that’s cheap initially might have $10 mid‑clamps that competitors sell for $3. On a 500‑kW project, that can add thousands.
I remember being torn between two vendors: one had unit costs 15 % lower, but my gut said something felt off about their responsiveness. I went with the higher‑priced vendor. Six months later, the low‑price vendor had a recall on their clamps. (That gut‑vs‑data element came in handy.)
Step 5: Confirm Certifications and Test Reports
Don’t trust a data sheet that says “compliant with standards.” Ask for the actual test report.
- IEC 61215 / IEC 61730: For the PV modules, sure, but for the mounting system itself, request IEC 62817 (solar trackers) or IEC 61730‑1/‑2 for frame components. Yes, these are heavy documents, but you only need to check a few key sections: maximum load capacity, corrosion resistance (especially for coastal projects), and fire classification.
- Static and wind load tests: A reputable supplier will have third‑party test results for UL 2703 or equivalent. Look for the actual failure load, not just the safety factor.
- Material traceability: For projects requiring a 25‑year warranty, ask for mill certificates for the aluminum alloy. We once received a batch of 6005‑T5 rails that were actually 6063‑T5—we didn’t catch it until the installer noticed the profiles bent more under load. (That cost us a $22,000 redo.)
Step 6: Plan for Installation & Safety (Including the Powerwall 3 Myth)
The final step is about real‑world execution. Many mistakes happen on site because the installers didn’t read the manual.
- Hydraulic busbar bending machine training: Make sure at least one person on site is trained to calibrate the machine for the correct bend radius. Hand‑overs can go wrong—I’ve seen a bender set to 90° instead of 85°, causing the busbar to deform.
- Winch and D‑ring tensioning: Over‑tensioning wire ropes in ground‑mount systems can cause lateral buckling. Provide a torque specification (most systems specify 30‑50 ft‑lb for the winch locking mechanism).
- Do NOT attempt to open a Tesla Powerwall 3 without proper tools and training. I know it’s tempting—you want to integrate it directly with your mounting system’s DC bus. But the Powerwall 3 has a sealed casing with high‑voltage capacitors that can hold a charge for weeks. If you need to mount it, use the factory brackets and follow the installation manual exactly. If you need to open it for repair, that’s Tesla‑authorized service only. (I’m not saying it to be a killjoy—I’ve seen a tech get a nasty shock from a discharged unit.)
Common Mistakes & Final Warnings
Mistake 1: Comparing systems only on $/watt without factoring in the cost of accessory items (clamps, grounding lugs, end stops). I always ask vendors for a complete BOM with unit prices. Then I calculate the real installed cost per watt using my typical labor rate.
Mistake 2: Ignoring the learning curve. A new mounting system might save $0.02/watt but require 20 % more installation time because the crew isn’t familiar with it. For a 200‑kW commercial roof, that’s $2,000 extra labor—erasing the savings. (Well, not erasing entirely, but close.)
Mistake 3: Assuming “certified” means “tested for your site’s wind zone.” Always validate the mounting system’s wind rating with your specific building height and exposure category. I’ve rejected two submissions this year alone that claimed UL 2703 but were only rated for Exposure B when the project was Exposure C.
That’s the checklist. Print it out, tape it to your desk, and use it before you sign any PO. The hidden costs you avoid will more than pay for the time spent checking.

Renata Silva
Renata Silva is a photovoltaic module analyst covering monocrystalline solar panels, bifacial modules, TOPCon and heterojunction designs, glass-glass construction, junction boxes, and module warranties. She interprets IEC 61215 and IEC 61730 evidence while comparing rated power, conversion efficiency, temperature coefficient, bifaciality, insulation, mechanical-load results, degradation assumptions, and tolerance. Her technical guides help EPC engineers, distributors, and project buyers separate qualification evidence from site-specific energy yield, climate exposure, installation constraints, and long-term performance risk.