Panel Mounting Systems vs. In-Roof Mounting Systems: A TCO Comparison from a Procurement Manager
2026-08-11 / Renata Silva
-
Why I Compare Mounting Systems Like This
-
Dimension 1: Total Cost of Ownership
-
Dimension 2: Installation Time and Labor
-
Dimension 3: Roof Protection and Risk
-
Dimension 4: Client Perception and Brand Impact
-
Dimension 5: Electrical Integration, Cables, and Monitoring
-
So Which Mounting System Should You Choose?
Why I Compare Mounting Systems Like This
I'm the procurement manager at a 40-person solar installation company. I manage a hardware budget of about $400,000 a year, and for the past six years I've documented every order in our cost tracking system. This comparison is based on that data, not on marketing pages.
Here's something vendors won't tell you: the first quote for a mounting system rarely includes the full accessory list. Clamps, end caps, grounding lugs, flashing kits, cable management, and adapters often add 15-20% to the project. So when I compare panel mounting systems and in-roof mounting systems, I use the total landed cost, not the initial quote.
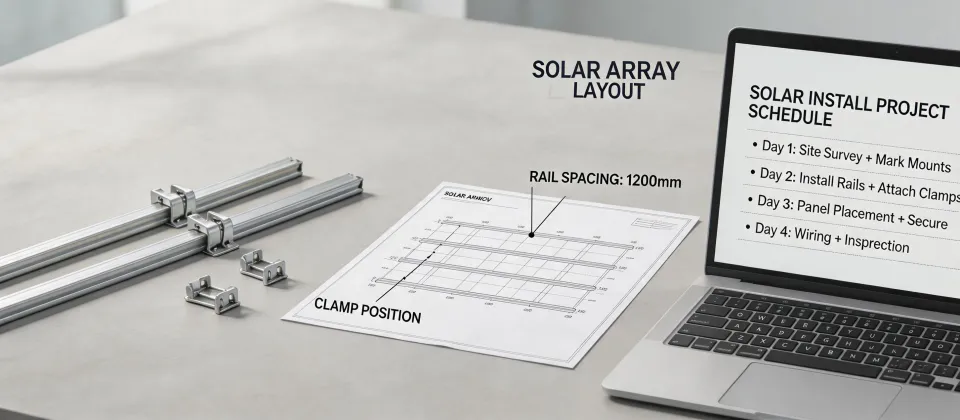
The two approaches are very different. Traditional panel mounting systems sit on top of the roof surface. In-roof mounting systems replace a section of the roof covering and make the panels part of the building envelope. Both can be excellent. The hard part is knowing which one is right for a specific roof.
Dimension 1: Total Cost of Ownership
In our 2024 procurement records across 14 projects, the material quote for traditional panel mounting systems averaged about 12% lower than in-roof mounting systems. But that difference nearly disappeared once we added roof-specific flashing, adapter rails, grounding hardware, and the extra clips needed to secure cable runs.
People think in-roof mounting systems are more expensive because they look more engineered. In many cases, the reverse is true. A traditional system on a tile roof can end up costing more because you're paying for both the mounting system and the roof integration parts. In-roof systems bundle that integration into one package.
One more note on cost claims: if a vendor tells you their rail is 'recyclable,' ask what exactly. Per FTC Green Guides (ftc.gov), environmental claims must be substantiated and not misleading. The aluminum may be recycled, but the coating and connectors may not be. That level of detail matters in a 30-year asset.
And I've been burned by the cheap route. We saved 12% on a third-party rail once. The clamp profile didn't match the roof attachment we already had. Rework and delay cost us $1,400. A lesson learned the hard way.
Dimension 2: Installation Time and Labor
Labor is the hidden line item. That's where budgets quietly die. For a 30kW commercial rooftop, our crews averaged 2.1 days on traditional panel mounting systems and 2.6 days on in-roof systems. But the difference was not caused by the system itself. It was caused by coordination. Traditional installs on tile roofs required separate roofers for flashing. In-roof installs did not.
If your crew knows in-roof systems, they can be faster than the traditional process. If they don't, expect a learning curve. The product doesn't decide. Your training does.
I had two hours to swap a mounting plan once after a structural review flagged a mismatch. Normally I'd get three quotes, but there was no time. I went with a trusted distributor and paid a small premium. It worked out, but I should have pushed back on the timeline. With the client's opening date locked, I made the best call with the information I had.
Dimension 3: Roof Protection and Risk
This dimension is where most people get the story backwards. They assume traditional mounting systems are safer because they're more familiar. But every roof penetration is a potential leak point. In-roof mounting systems replace the roof material in that area, so the waterproofing is part of the system rather than an afterthought.
For old tile or slate roofs, in-roof often seals better and looks better. For standing-seam metal roofs, traditional panel mounting systems with non-penetrating clamps are often the smarter choice. No holes at all, and the rails run parallel to the seams. So the best choice depends on the roof profile, not on a preference for one type.
Don't let a vendor sell you a solution before you define the roof condition. If the roof is marginal, replacing it first or choosing an in-roof system that becomes part of the envelope can be more honest than adding new penetrations on top of old material.
Dimension 4: Client Perception and Brand Impact
Here's where quality becomes a business issue, not just an engineering issue. The finished roofline is what the client sees every day. An in-roof system looks like the building was designed for solar. A traditional system, done carelessly, looks like solar was added later. That first impression shapes how people judge the entire installation.
I don't believe 'budget' automatically means bad. But I do believe that saving $400 on a mounting system can cost you a client's trust when the cables sag and the panels look misaligned. In our 2024 post-project survey, clients rated in-roof installations 23% higher on overall perceived quality than traditional installations with the same panels and inverter.
When I switched from the lowest-bid mounting vendor to a supplier with tighter tolerances, the change wasn't just about hardware. Quality is the brand. A customer who sees a sloppy rack assumes the wiring is sloppy too. Period.
Dimension 5: Electrical Integration, Cables, and Monitoring
This dimension usually gets ignored until the electrician is on site. Mounting systems carry cables, junction boxes, monitoring sensors, and sometimes inverter wiring. The routing affects labor, troubleshooting, and the final look.
We standardized on the Cuddeback metal solar cable for solar kit 3501 and 3532 for exposed runs between the array and the inverter. The metal sheath holds up better to UV and rodents than the plain PV wire we used in our first year. It costs more, but the service calls we avoided paid for it.
If you're adding a weather station monitoring system, think about where the sensor cable goes before you finish the mounting layout. We learned this the hard way when an anemometer cable got pinched under a panel because the traditional rail system had no designated cable path. We now spec a harness clip kit for every rail project. In-roof systems generally give you a cleaner channel for sensor wiring, and it's easier to replace a wire without lifting panels.
And the most common question from clients is how to connect solar inverter to wifi. The answer isn't complicated—usually WPS on both devices—but the real challenge is signal strength. In one project, the inverter ended up on the north wall, far from the router, and the wifi signal kept dropping. We added a $60 powerline adapter to the BOM. We caught it during the mounting design review instead of after handover.
So Which Mounting System Should You Choose?
If the roof is new, the client cares about aesthetics, and the local crew has in-roof training, in-roof mounting systems are often the right call. They reduce visible clutter, simplify waterproofing, and improve perceived quality.
If the roof is standing-seam metal, the schedule is tight, or the budget is genuinely limited, traditional panel mounting systems can deliver excellent results. Just don't use a 'cheap' rail to save 12%. That's the rework tax I've already paid.
For every project, build a Total Cost of Ownership spreadsheet before you commit. Include accessories, labor, roof-specific adapters, cabling, monitoring, and service access. Compare the full list, not the first quote. That's the only way to know what you're actually paying for and what your client will think of your work ten years from now.
Bottom line: quality isn't a marketing feature. It's the difference between a roof that looks like an asset and a roof that looks like a billboard. Choose the mounting system that respects both the building and the budget.

Renata Silva
Renata Silva is a photovoltaic module analyst covering monocrystalline solar panels, bifacial modules, TOPCon and heterojunction designs, glass-glass construction, junction boxes, and module warranties. She interprets IEC 61215 and IEC 61730 evidence while comparing rated power, conversion efficiency, temperature coefficient, bifaciality, insulation, mechanical-load results, degradation assumptions, and tolerance. Her technical guides help EPC engineers, distributors, and project buyers separate qualification evidence from site-specific energy yield, climate exposure, installation constraints, and long-term performance risk.