Ground Solar Panel Mounting Systems: A 6-Step Installer's Checklist
2026-09-02 / Renata Silva
-
Step 1: Nail Down Your Load Numbers
-
Step 2: Match the Mounting System to the Site
-
Step 3: Verify Compatibility—Actually Measure It
-
Step 4: Know Your Inverter From Your Converter
-
Step 5: Price Complete Grid-Tie Kits on Total Cost, Not Sticker Price
-
Step 6: If You're in a Freeze Zone, Plan for Cold Mounting
-
Common Mistakes That Turn Into Emergency Calls
If you're reading this, you're probably mid-way through sourcing components for a ground-mounted solar array. Or maybe you're just starting and trying to avoid the mistakes everyone else made. Either way, this checklist is for you.
Here's where I'm coming from: I've spent the better part of a decade coordinating emergency installations and rush deliveries for solar projects that went sideways. Some were utility-scale fields. Most were mid-size commercial and small residential jobs where one component mismatch cost weeks of delay. The list below is what I run through every time someone calls me at 4 p.m. on a Friday with an urgent problem.
Six steps. Five minutes each. Skipping one can add a month to your schedule.
Step 1: Nail Down Your Load Numbers
Every ground solar panel mounting system lives or dies by three numbers: wind speed, snow load, and soil bearing capacity. Not the regional averages—your site's actual numbers.
- Wind speed — use the local building code's wind speed map, not a general assumption that it's not too windy.
- Snow load — same source, same logic.
- Soil bearing capacity — this one takes a geotech report. It's the step everyone skips to save $600.
I only believed in geotech reports after skipping one and watching a ballasted ground mount shift 12 centimeters over the first winter. The rework cost us $5,800—about ten times what the soil test would have cost.
Step 2: Match the Mounting System to the Site
Ground mounts come in three main types:
- Driven piles — fast and cheap on open, flat land with decent soil. But they're not an option if you're on rock or a site with strict ground-penetration rules.
- Concrete ballasts — no penetration, which makes them great for sensitive sites. They need enough weight to resist uplift, and they're heavy to haul and place.
- Ground screws / helical anchors — a flexible middle option that works in more soil types and can be extracted if the array needs to move.
Don't pick a system just because your supplier stocks it. Pick the one that matches your site's constraints. This is the decision everything else depends on.
Step 3: Verify Compatibility—Actually Measure It
In my experience, most compatibility problems come from assuming, not from measuring. Your PV module's dimensions, frame height, and weight all need to be within the mounting system's stated range. Check three things:
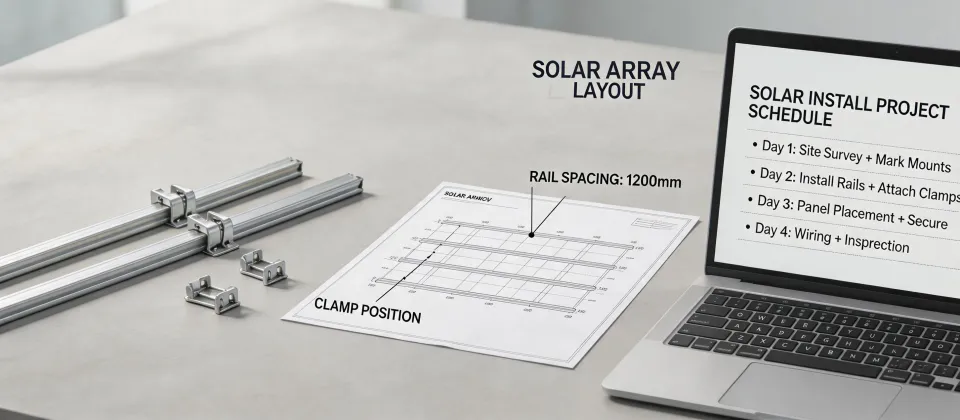
- Module dimensions vs. rail spacing limits
- Clamp width vs. module frame thickness
- Wind load rating vs. your module's dimensions
It took me about 150 orders to understand that the word compatible is a range, not a yes/no label. You need to be inside that range, not right at the edge.
Step 4: Know Your Inverter From Your Converter
I see this mix-up more than I should. A power inverter converts DC electricity to AC. A converter changes DC to a different DC voltage. Different jobs, different equipment.
If your system feeds into the grid, you need an inverter—and it needs to meet IEEE 1547 standards for grid interconnection. A DC-to-DC converter won't do the job. And if you're assembling a system from parts, make sure the complete kit you're looking at actually includes an inverter, not just a charge controller.
Also—and this might be obvious to you—don't confuse a solar inverter with a car power inverter. Brands like Ryobi make automotive power inverters for running small appliances from a vehicle's 12V outlet. That's a completely different product for a completely different use case. I've had people ask if they can use one for a solar array. The answer is no.
Step 5: Price Complete Grid-Tie Kits on Total Cost, Not Sticker Price
If you're comparing pre-assembled systems, read the kit reviews carefully. The kit price often excludes mounting rails, clamps, disconnect switches, conduit, wiring, and shipping. I've seen an $1,800 kit with a cheap sticker price end up costing $2,600 once all the missing pieces were added.
Make a full parts list before comparing prices. Then add 10% for the small stuff you forgot. That number is your real budget.
Step 6: If You're in a Freeze Zone, Plan for Cold Mounting
Cold mounting systems are a different beast. Frost heave is relentless—it will push footings out of level, often unevenly, and it will do it during the first winter after installation.
Concrete footings need to sit below the frost line. For ground screws, check the manufacturer's depth recommendation for your specific frost depth. Ballasted systems need enough weight to resist frost movement in addition to wind uplift.
In early 2024, I saw a 47 kW ground system lose three rows to frost heave because the installer used a one-size-fits-all standard depth that didn't account for the local frost line. The fix meant pulling every footing and starting over. That's not an emergency you can fix with a rush order.
Common Mistakes That Turn Into Emergency Calls
After a decade of solving urgent problems, here's what I see on repeat:
- Assuming lead times are flexible. Custom-length rails can take 6–8 weeks. Order early.
- Skipping the site survey. Slope, soil, drainage—all of it needs to be known before you order.
- Mixing connector brands. MC4 is the common standard, but not every MC4 connector is fully compatible with other brands. Check the spec sheet.
- Under-sizing wire. Long runs from array to inverter have voltage drop problems. Use the right gauge, not the one that's close enough.
Look, I'm not saying every install goes wrong—most don't. But every single emergency I've dealt with came from one of these steps being skipped. Take the extra 30 minutes to check the list. It's cheaper than any rush order I can quote you.
One last thing for the small-scale installers: whether you're putting in 10 panels or 100, you deserve gear that fits and service that respects your timeline. Small projects are how good suppliers earn your bigger projects later. Don't let anyone talk down to you because your order is small.

Renata Silva
Renata Silva is a photovoltaic module analyst covering monocrystalline solar panels, bifacial modules, TOPCon and heterojunction designs, glass-glass construction, junction boxes, and module warranties. She interprets IEC 61215 and IEC 61730 evidence while comparing rated power, conversion efficiency, temperature coefficient, bifaciality, insulation, mechanical-load results, degradation assumptions, and tolerance. Her technical guides help EPC engineers, distributors, and project buyers separate qualification evidence from site-specific energy yield, climate exposure, installation constraints, and long-term performance risk.