Solar Mounting Systems: An 8-Point Procurement Checklist from a Cost Controller
2026-09-08 / Renata Silva
-
The eight checks I run before signing a racking PO
-
Check 1: Validate the site before you validate the product
-
Check 2: Ask for the UL listing and the recycling fine print
-
Check 3: Spec electrical accessories next to the rails
-
Check 4: Get specific about battery heat
-
Check 5: Plan for cameras, radios, and quick-service mounts
-
Check 6: Compare total cost, not base quotes
-
Check 7: Count labor hours, not just parts
-
Check 8: Read the warranty claims process like your CFO would
-
Check 1: Validate the site before you validate the product
-
Two mistakes that still show up in every invoice audit
Take it from someone who has signed racking purchase orders for the past six years and audited every one of them: the mounting system is where a commercial solar budget goes to die. I’m a procurement manager at a 35-person solar and storage installer. I manage roughly $1.8M a year in racking hardware, electrical accessories, and battery components. This is the checklist I pull up before I approve any racking PO.
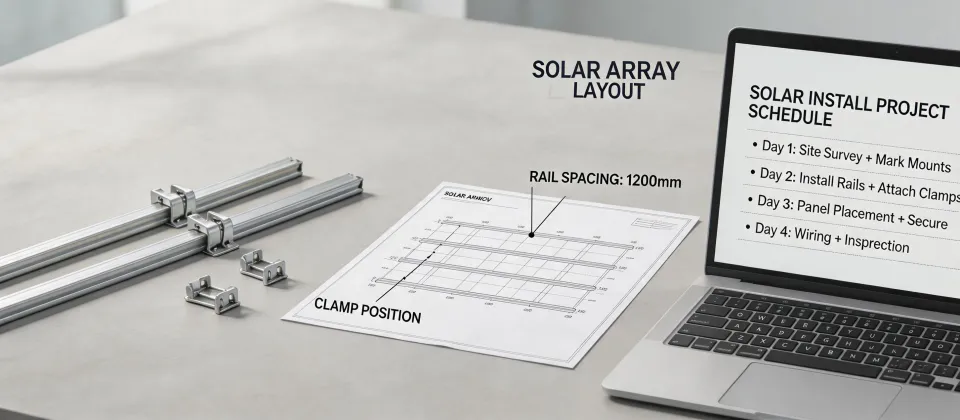
Use it when you are comparing flat-roof, pitched-roof, ground, or carport solar mounting systems—especially if the project also includes batteries, charge control, cameras, or a portable power source. Eight checks, and the order matters. Don’t jump to pricing first.
The eight checks I run before signing a racking PO
Check 1: Validate the site before you validate the product
The first thing I check is not the mounting system. It’s the site assumptions baked into the quote. A 4-degree tilt on a flat roof prices differently than a 10-degree tilt. A membrane roof has different attachment rules than a gravel ballast roof. Ground conditions, wind zone, snow loads, seismic design category—all of it changes the bill of materials.
Here’s what you need to know: if a supplier’s quoting tool only asks for module length and roof type, treat that quote as incomplete. I’m not an engineer, so I won’t pretend to validate structural calcs. What I can tell you from a procurement perspective is that a cheap quote gets expensive exactly when the stamped engineering report comes back and says the clamp spacing is wrong for your county’s wind speed. The most frustrating part of this job is watching a “savings” disappear into a re-design fee that should have been caught in week one.
Check 2: Ask for the UL listing and the recycling fine print
Second, ask for the paperwork before the price. From the outside, every “UL listed” racking product looks like the same stamp. The reality is that UL 2703 evaluates the mounting system as an assembly—rail, clamp, and bonding path—not just as a piece of aluminum. That distinction matters because it tells your electricians whether the clamp-to-rail connection is a tested grounding path or a field experiment.
Ask for the UL file number. Ask whether the exact module model in your bill of materials is included in the listing. Then check the environmental marketing claims. Per the FTC Green Guides (16 CFR Part 260), a product can be called “recyclable” without qualification only if recycling facilities are available to a substantial majority of consumers where the product is sold. If a vendor says the system is 100% recyclable, ask whether that applies to the extrusion, the finish, the fasteners, or just the cardboard box.
Check 3: Spec electrical accessories next to the rails
Third, spec the electrical accessories at the same time as the mounting system. A racking system is not just aluminum; it’s the platform for disconnects, combiners, inverters, surge protectors, and battery controls. If you’ve ever asked, “What does a solar charge controller do?”—here’s the plain-English version: it sits between the PV array and the battery bank and does three jobs. It prevents overcharging, it stops reverse current from draining the battery at night, and in MPPT models it adjusts the operating voltage so the array works closer to its maximum power point. PWM models handle the first two jobs at a lower upfront cost, but they don’t track the maximum power point, so in many climates you leave some harvest on the table.
Before you choose clamps, find out where those electrical boxes will physically go. A “frame-only” price that forces your crew to add strut channel and drill holes in the field isn’t cheaper; it’s just deferred labor. If the scope includes an outdoor portable power supply, treat it like a battery enclosure, not like an appliance. It still needs a secure mount, ventilation clearance, and orientation. A portable unit that gets bolted to a ground frame without checking the frame’s load path will cause problems eventually. If the racking supplier says “we don’t provide brackets for that,” that’s a red flag worth taking seriously.
Check 4: Get specific about battery heat
Fourth, get specific about heat if batteries are in scope. Lithium cells degrade faster in heat, and the enclosure around them is part of the system design. More manufacturers are using phase change materials for thermal energy storage to flatten temperature spikes inside battery cabinets. A phase change material absorbs heat as it changes phase, usually from solid to liquid, which delays the temperature rise inside the enclosure during the hottest part of the day.
If a vendor mentions PCM, ask two questions. What is the phase transition temperature, and was the full enclosure tested in full sun, not just modeled as a cell block? If the enclosure has not been tested as installed, ask whether the whole battery storage system has been evaluated to UL 9540A. A cabinet that looks great in a datasheet but cooks itself in July is an operational cost, not an upfront line item.
Check 5: Plan for cameras, radios, and quick-service mounts
Fifth—and this is the step most people skip—plan for everything else that has to be mounted, not just the modules. Almost every commercial site owner eventually asks for surveillance. Camera mounting systems for solar structures are different from camera mounts on a static wall. A solar carport or ground-mount frame moves slightly in wind and thermal cycles, so a rigid bracket designed for a parapet wall can create micro-movement and vibration at the camera. That shortens the life of the camera and produces shaky footage.
Also think about service access. Security and access-control distributors sell what they call holster mounting systems: steel brackets with a latch where a camera, radio, or charge controller drops in, locks, and releases without tools. For a device mounted high on a ground-mount row, a holster-style bracket can turn a 45-minute service call into a 10-minute swap. Our remote sites now spec them for any component that is likely to be replaced during the system’s life.
Check 6: Compare total cost, not base quotes
Sixth, put every quote into a total cost of ownership table. A base price comparison tells you almost nothing. The rows I use are simple:
- Hardware exactly as it ships, not per “row” or “bay”
- Mid-clamps and end-clamps counted against the actual module count
- Bonding and grounding hardware, lugs, and splice kits
- Freight to the jobsite
- Stamped engineering or PE letter required by the AHJ
- Estimated field labor based on shop drawings
In Q2 2024, we ran three ground-mount quotes through this table. Vendor A quoted $132,500 all-in. Vendor B quoted $123,600—about $8,900 lower, which looked like a no-brainer. Then we added B’s missing grounding hardware at $6,200 and separate freight at $5,100. Vendor B’s real total was $134,900, about $2,400 higher than Vendor A. The surprise wasn’t the price difference. It was how much value Vendor A had bundled into the base price: stamped drawings, freight, and grounding lugs. The bottom line is that the cheapest quote on paper was the most expensive one by the end of the month.
Check 7: Count labor hours, not just parts
Seventh, get realistic about field labor. One mounting system can look cheaper per watt but require twice as many pieces to assemble on site. Another system may use fewer parts but need specialized tools or a longer learning curve for the crew. We track labor hours by racking model on every project, and the pattern is clear: the lowest hardware price rarely produces the lowest installed cost.
To be fair, a simpler system with fewer parts isn’t always faster either. The right question is whether the installers have worked with that system before. If they have, the estimate is trustworthy. If they haven’t, add a training day to the TCO. Labor that goes into fighting unfamiliar hardware is not the manufacturer’s fault, but it is still your budget.
Check 8: Read the warranty claims process like your CFO would
Eighth, read the warranty section as if you are going to file a claim in year four, because you probably will. Ask these questions before signing: Are replacement parts shipped before the failed parts are returned? Who pays freight in both directions? Is labor covered? Does the warranty transfer if the project is sold to a new owner?
The answers tell you more than the warranty length. A vendor that says “we’ll handle it case by case” is asking you to accept risk that should be priced into the contract. A vague claims process can be a deal-breaker, no matter how clean the hardware looks.
Two mistakes that still show up in every invoice audit
The first mistake is matching the quote to the wrong bill of materials. I’ve had quotes where the system was sized for 2,400 modules but the project had 2,610, and the clamp count simply didn’t add up. Verify module count, row length, and clamp count against the actual layout, not against the summary page.
The second mistake is changing the site conditions after the engineering is stamped. If the roof owner suddenly says no penetrations are allowed, or the soil report comes back softer than expected, the mounting system has to be re-evaluated. Reusing the old stamped calcs to save time is tempting, but it’s exactly how a small change becomes an expensive rework.
When a quote survives these eight checks, I sign it. When it doesn’t, I don’t care how low the unit price is, because I’ve learned the hard way that “good enough on paper” has a way of getting expensive in the field.

Renata Silva
Renata Silva is a photovoltaic module analyst covering monocrystalline solar panels, bifacial modules, TOPCon and heterojunction designs, glass-glass construction, junction boxes, and module warranties. She interprets IEC 61215 and IEC 61730 evidence while comparing rated power, conversion efficiency, temperature coefficient, bifaciality, insulation, mechanical-load results, degradation assumptions, and tolerance. Her technical guides help EPC engineers, distributors, and project buyers separate qualification evidence from site-specific energy yield, climate exposure, installation constraints, and long-term performance risk.