Solar Mounting Systems South Africa: A Quality Inspector’s 7-Step Procurement Checklist
2026-09-09 / Renata Silva
-
What is a solar module?
-
A 7-step mounting-system checklist
-
Step 1: Lock down the module datasheet and mounting zone
-
Step 2: Request site-specific wind load calculations in writing
-
Step 3: Check material compatibility at every contact point
-
Step 4: Turn bullet point mounting systems claims into measured specs
-
Step 5: Don’t separate mounting hardware from electrical BOS
-
Step 6: Inspect a production sample before approving a large order
-
Step 7: Keep documents that connect the approved spec to later deliveries
-
Step 1: Lock down the module datasheet and mounting zone
-
Watch-outs I learned the hard way
I’m the quality/compliance manager at a solar mounting manufacturer. I review every mounting-system drawing and bill of materials before it goes out to a customer—roughly 200 unique orders a year. I’ve rejected first deliveries in Q1 2025 for missing module frame height, for clamp torque values that weren’t specified, and for one rail profile that was 2.5 mm off the approved drawing. That sounds picky. It isn’t. A mounting system can look fine for years and then fail at a clamp nobody verified.
This checklist is for solar installers, EPC project managers, and small developers who need to buy or specify a mounting system. It applies to flat-roof, pitched-roof, ground, and carport projects. It’s written for people who aren’t mounting-system engineers but need to ask the kind of questions that keep a project safe and bankable.
What is a solar module?
A solar module is the rectangular panel that converts sunlight into DC electricity. A typical module contains silicon cells, glass, an encapsulant, a backsheet, an aluminum frame, and a junction box with cables. For mounting-system selection, the important numbers are module length, width, thickness, frame height, weight, and the module manufacturer’s allowed mounting zone. The mounting system attaches to the module frame at approved points; the frame is not a place to improvise.
One source of confusion: a 1200W portable power station is not a solar module. It’s a portable battery with an inverter and charge controller. You can charge it from a solar module, but it does not replace the PV module in a permanent installation. In my technical review calls, I get this question more often than you’d expect.
A 7-step mounting-system checklist
Do not try to evaluate a mounting system using only price or “compatibility” claims. Work through these steps in order. They take maybe an hour the first time and will save more than that after the first bad shipment.
Step 1: Lock down the module datasheet and mounting zone
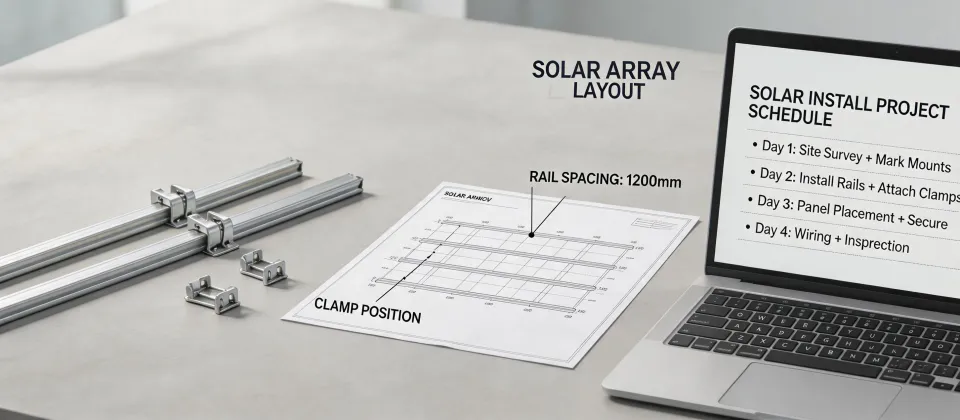
Before you choose a rail profile or end clamp, open the module datasheet. Write down the module dimensions, frame height, weight, and the recommended clamping zone. Many modules have a strict maximum distance from the edge where clamps can sit. Clamp outside that zone and you risk frame deformation, uneven load distribution, or a voided module warranty.
Checkpoint: send the mounting supplier one page with module make/model, dimensions, frame height, and maximum mechanical load. If someone changes the module later, restart this step. Don’t assume all 60-cell or 72-cell modules are identical.
Step 2: Request site-specific wind load calculations in writing
For solar mounting systems South Africa, wind loading is not a marketing adjective. It’s a structural calculation based on local wind zone, exposure, building height, roof zone, and module geometry. I’ve seen rail schedules labeled “40 m/s wind” that didn’t mention terrain or mounting height. Those details matter. A 40 m/s gust on an exposed ground mount loads the rails very differently than a sheltered rooftop behind a parapet.
Ask the supplier: “Which standard did you use? What wind speed and exposure did you assume? Is the calculation signed off by an engineer?” If the only answer is a brochure, that’s a red flag.
Step 3: Check material compatibility at every contact point
Aluminum rails with aluminum module frames are usually fine. But mounting systems also use bolts, washers, brackets, and sometimes steel bases or roof attachments. In coastal environments, corrosion can start at the smallest hardware difference.
Ask for material grades and coating thicknesses. “Zinc-plated” is not enough detail. “Anodized aluminum” is not enough detail either. Request the coating spec and, for large orders, a mill certificate or batch test. A 2022 verification protocol change I helped implement reduced clamp-related callbacks by roughly one-third the following year. The parts weren’t necessarily bad before; the change forced suppliers to document what they actually shipped.
Step 4: Turn bullet point mounting systems claims into measured specs
Search for “bullet point mounting systems” and you’ll get list-style marketing: lightweight, pre-assembled, corrosion-resistant, compatible with most modules. Those bullet points are a starting point, not evidence. If a supplier says “tested,” ask to what standard and under what load. If the claim says “corrosion-resistant,” ask for salt-spray hours and the alloy or coating tested.
Per FTC guidance (ftc.gov), advertisers need substantiation for performance and environmental claims. That principle applies to solar hardware too. More importantly, using it in procurement helps you separate suppliers with test reports from suppliers with a good copywriter.
Step 5: Don’t separate mounting hardware from electrical BOS
Mounting rails and clamps are only part of the structure. You also need to manage inverters, battery storage components, cable trays, optimizers, and sometimes EV charging equipment. If your project includes an EV charger installation Baltimore MD, for example, a solar carport might need to support cable routing, conduit, and charger enclosure mounting. Those decisions affect rail spacing and system layout.
It’s tempting to treat the mounting system as purely mechanical. In practice, the quality of the final installation depends on how well the mechanical and electrical scopes are coordinated before the order is placed.
Step 6: Inspect a production sample before approving a large order
Approval via PDF is not approval. I’ve seen drawings that looked correct, only for the sample to arrive with a different end cap, a longer bolt, or a missing grounding tag. If you’re buying fifty roof kits, request one full sample from current production and check it against the approved drawing.
On the sample, verify the clamp profile engages the module frame properly, the torque range is marked, the coating is even, and the hardware bag matches the bill of materials. Also confirm the sample wasn’t hand-polished by the sales team. It should look like the next unit that gets loaded on a truck.
Step 7: Keep documents that connect the approved spec to later deliveries
Quality isn’t decided by one sample. It lives in the documents: approved drawings, the revision number, the coating cert, the load calculation, and the installation torque values. If the supplier changes a rail profile or clamp design after approval, ask for updated calculations. Don’t accept the word “equivalent” unless it includes engineering evidence.
Keep installation instructions accessible too. A torque checker on site is useless if nobody knows the specified value. In my experience, “tighten securely” is not a torque spec.
Watch-outs I learned the hard way
- Last-minute module substitutions: A lower-profile module or a different frame thickness can change the clamp size, rail spacing, and load path. Recheck everything before accepting a substitute.
- Roof assumptions: Both ballasted and penetrated mounting systems have their place, but neither works safely without a confirmed roof structural evaluation. Ask for the roof construction details first.
- Beautiful marketing documentation: Some of the cleanest spec books I’ve seen were missing the two most important papers: the signed load calc and the material certificate. Start there.
This was accurate as of early 2025. Codes change, standards evolve, and product lines are revised, so verify current South African regulations and project-specific requirements before you commit to a mounting system.
An informed customer asks better questions and makes faster decisions. I’d rather spend fifteen minutes explaining the checklist now than coordinate a clamp failure after installation.

Renata Silva
Renata Silva is a photovoltaic module analyst covering monocrystalline solar panels, bifacial modules, TOPCon and heterojunction designs, glass-glass construction, junction boxes, and module warranties. She interprets IEC 61215 and IEC 61730 evidence while comparing rated power, conversion efficiency, temperature coefficient, bifaciality, insulation, mechanical-load results, degradation assumptions, and tolerance. Her technical guides help EPC engineers, distributors, and project buyers separate qualification evidence from site-specific energy yield, climate exposure, installation constraints, and long-term performance risk.