Solar Mounting Systems: 14 Mistakes, $23k, and the Pre-Check That Stopped the Bleeding
2026-08-17 / Renata Silva
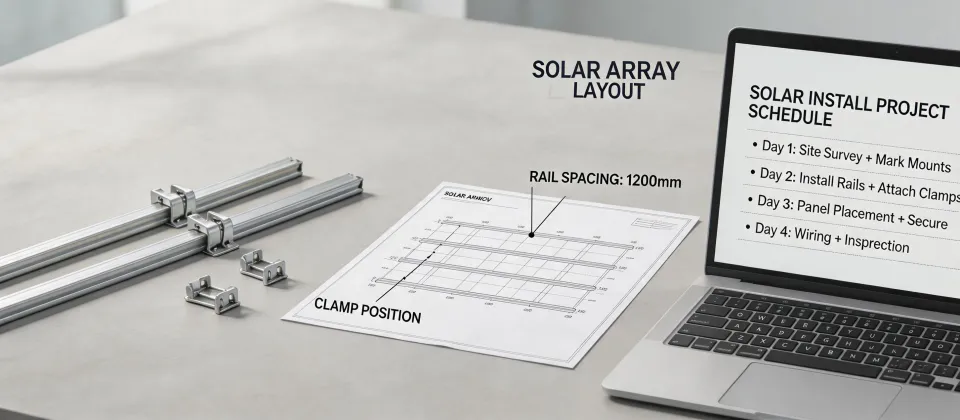
If you're evaluating solar array mounting systems, start with the mounting system's wind load rating, not the panel. That one reversal would have saved me $23,000 across six years of procurement and installation.
I'm the procurement coordinator handling mounting systems orders for six years. I've personally made and documented 14 significant mistakes, totaling roughly $23,000 in wasted budget. Now I maintain our team's checklist to prevent others from repeating my errors.
For a solar project, the mounting system is the hinge. It affects structural integrity, install hours, ballast or penetration requirements, and electrical grounding path. Panels get the attention, but the racking is where projects gain or lose money.
Why I can say this without sugarcoating
In my first year (2017), I made the classic "the quote includes rails" mistake. It didn't. We received clamps and end caps but no rails. That order held up the project for three days.
The carport disaster happened in September 2022. I said "we're doing a standard carport mounting system." The engineer heard "use the precalculated wind table without site-specific exposure." Result: one failed inspection and a redesign. $3,200 in extra steel plus a two-week delay.
After the third rejection in Q1 2024, I created our pre-check list. Since then, we've caught 47 potential errors using it in about 18 months. That number isn't a brag. It's a measure of how easy it is to get ordering details wrong.
What I keep seeing in solar array mounting systems
1. Choosing the panel before the racking
Most project specs start with module wattage because that's what the marketing sheet highlights. But in my opinion, confirmation should start with the mounting system interface: rail spacing, clamp width, module length, and grounding method.
We once ordered clamps based on a verbally agreed "25mm profile." The actual frame measured 30mm. 42 pieces, $1,850, straight to the rework pile. I still kick myself for not sending a marked-up drawing. If I'd spent five minutes with a digital caliper first, the order would've been correct.
The fix: put module dimensions and clamp width on the same line in your specs. Not separate pages. Same line.
2. Treating carport mounting systems like elevated ground mounts
Carport mounting systems look like ground mounts with legs, but air moves under the array, so wind uplift behaves differently. More often than not, the wind design is the deciding factor.
In September 2022, we approved a carport layout without checking the local wind load path. The inspector flagged the uplift coefficient. Rework cost $3,200 and a two-week delay—and that's besides the embarrassment.
What I learned: if the code official asks for the wind calc on a carport, don't wing it. Use a carport mounting system with documented engineering, include the exposure category, and keep the site-specific calc even when the dashboard says "pre-approved."
3. Electrical accessories as an afterthought
Mounting systems aren't just mechanical. The grounding path, inverter mounting, surge protector placement, and battery storage connections all sit on or near the racking.
We didn't have a formal BOM review process. Cost us when an inverter DC input range didn't match the array string voltage. It wasn't a small mismatch; the whole string had to be reconfigured. Two days of labor and a commissioning delay.
Now the checklist includes electrical accessories in the same procurement cycle. Switching to a digital spec sheet and an automated voltage-drop calculator eliminated the data entry errors we used to have. Total turnaround on that portion went from five days to two.
4. How much land does a wind turbine need? And why it's the wrong first question
Developers often ask "how much land does a wind turbine need?" The accurate answer: it depends. According to WINDExchange (windexchange.energy.gov, accessed February 2025), a common planning range for turbine spacing is 30 to 60 acres per megawatt, though the physical footprint is much smaller.
For a solar array, the land use question is more direct. Fixed-tilt solar arrays using conventional solar array mounting systems usually need roughly 4 to 8 acres per megawatt, depending on row spacing and site constraints (Source: NREL, nrel.gov, accessed February 2025). The mounting system's row spacing controls that number. Single-axis trackers need more land; carports and flat roofs use zero new land. So compare land use per installed watt, not just turbine nameplate or project acreage.
5. Forgetting portable power in the field plan
This sounds unrelated to mounting systems, but field productivity is mounting-system quality too. Installers who spend two hours running extension cords aren't paying attention to alignment.
We switched to a Diehard portable power station for charging battery tools and running laptop diagnostics. A Rock solar generator powers the site trailer's controller and check-in station when keeping a gasoline generator running isn't worth the noise. That's not a structural mounting decision, but it changed how carefully our crew tightened rail connections.
If you ask me, portable power is one of the most underestimated efficiency levers on solar sites. Less time managing power logistics means more time getting the mounting systems right.
The pre-check that finally worked
After the third rejection, I made our team a checklist. It isn't clever. It's a list of things I've already been burned by.
- Confirm clamp width and module dimension against the mounting system's official drawing. Not a datasheet from the panel rep. Not the salesperson's "same enough." The drawing.
- Confirm the wind load code path. ASCE 7-22, local amendments, and exposure category. For carport mounting systems especially, verify the under-panel pressure coefficient with the system provider's engineering documents.
- Order electrical accessories at the same time as the mounting system. Check inverter DC input range, battery voltage, and surge protector voltage against the array string Voc and Vmp.
- Match row spacing to actual land boundaries. Don't size a ground-mount array with idealistic boundaries. Use the mounting system's minimum row spacing, setbacks, and topographical constraints to calculate the real footprint.
- Plan portable power for the field. List the Diehard portable power station or Rock solar generator on the equipment sheet if they're part of the crew's setup. The goal is to remove the temptation to bypass electrical checks because "the generator is too far away."
Personally, I'd rather see a slightly higher bolt price with correct clamps than a cheap part with a schedule delay. There's something satisfying about a carport array that goes through approval with zero redlines. That's the payoff.
When this checklist won't save you
Be honest: this checklist doesn't handle every edge case. A weird standing-seam roof profile, a custom architectural canopy, or a mounting system from a discontinued line will still need an engineer's stamp. The checklist catches routine errors; it doesn't replace structural review.
Also, I'm not saying every traditional workflow is obsolete. Custom engineering still has value, and portable power equipment doesn't build the array by itself. The point of efficiency is to free people up for the decisions that require judgment.
If you're about to say "we've done this before, no problem," that's the exact moment to pull up the drawing and check the clamp width. I've been there. The $23,000 tuition is already paid.

Renata Silva
Renata Silva is a photovoltaic module analyst covering monocrystalline solar panels, bifacial modules, TOPCon and heterojunction designs, glass-glass construction, junction boxes, and module warranties. She interprets IEC 61215 and IEC 61730 evidence while comparing rated power, conversion efficiency, temperature coefficient, bifaciality, insulation, mechanical-load results, degradation assumptions, and tolerance. Her technical guides help EPC engineers, distributors, and project buyers separate qualification evidence from site-specific energy yield, climate exposure, installation constraints, and long-term performance risk.