Solar Mounting Systems Brochure: A Quality Inspector's 6-Point Checklist
2026-08-18 / Renata Silva
-
1. Start With the Load Table, Not the Photos
-
2. Match the Ratings to Your Actual Site
-
3. Verify Module Compatibility in Millimeters
-
4. Count Every Part in the Bill of Materials
-
5. Estimate Installation Time Before You Compare Price
-
6. Read the Warranty—and the Fine Print That Kills It
-
What We See Go Wrong
I'm the quality and brand compliance manager at Mounting Systems, a company that makes solar PV racking for commercial and industrial projects. For the past four years, I've reviewed every brochure, datasheet, and spec sheet before it reaches customers—roughly 200 items a year. I've rejected 12% of first deliveries in 2025 so far, mostly due to unclear load tables or claims that couldn't be verified.
Most people start by asking what size solar system they need for a building. The question that follows doesn't get enough attention: which mounting system is going to hold that array down?
Here's what you need to know: a mounting systems brochure is a marketing document, not an engineering manual. It's a starting point. If you're an installer or an EPC comparing racking options, this is the six-point checklist I use when I evaluate a system. It took me a while to narrow it down, but these are the checks that actually separate a reliable system from a pretty PDF.
1. Start With the Load Table, Not the Photos
The first thing I do is flip past the glossy renderings and find the load table. If a brochure claims a 3.6 kPa snow load or a 2.4 kPa wind load, I need to see the test report behind that number. Look for a recognized standard—UL 2703 for racking in North America, or an IEC standard for the module attachment. Look for a lab reference, not just 'tested and certified.'
Per FTC guidelines (ftc.gov), advertising claims have to be substantiated. Load ratings are claims. If the manufacturer can't send a test summary within a couple of days, that tells you something. Honestly, I've seen sales sheets with impressive numbers that turned out to be copied from a different manufacturer's test report.
Check: Does the brochure name the test standard and the lab?
2. Match the Ratings to Your Actual Site
This sounds obvious, but we get asked to quote systems for sites that exceed the published ratings more often than you'd think. A load table only means something in context: roof height, exposure category, wind speed zone, altitude. A system rated for 120 mph in open terrain is not the same as one rated for 120 mph in a coastal exposure.
I remember one commercial flat-roof job—if I remember correctly, it was in 2023—where the customer's engineer didn't realize the local code required 150 mph wind design. The standard mounting system was fine for 130 mph. That difference cost them a $22,000 redo and pushed the schedule back three weeks.
(Should mention: most manufacturers have engineered solutions for higher wind regions. They're just not on the first page of the brochure. You have to ask.)
Check: Does this rating cover my site's wind zone, exposure, and height above grade?
3. Verify Module Compatibility in Millimeters
Here's the step most people skip. The brochure says 'compatible with all major solar modules.' That phrase is marketing, not engineering. Module frames are not standardized: frame height, clamp zone width, and corner bolt patterns all vary from one manufacturer to the next.
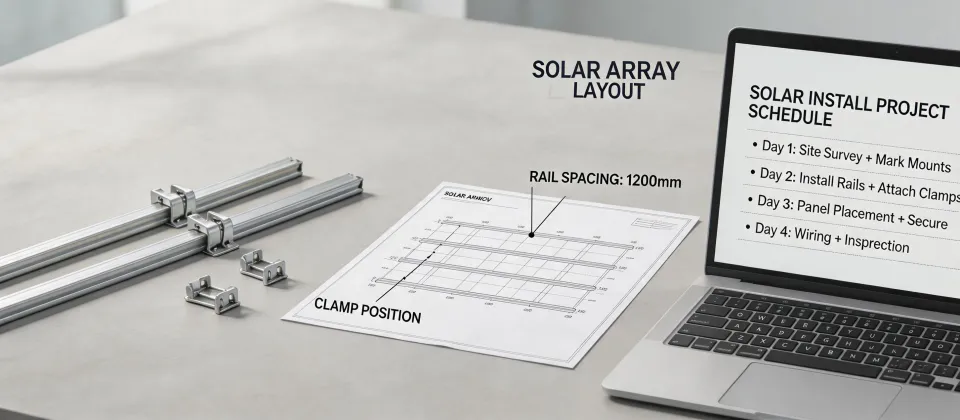
Open the technical drawing page and find the exact dimensions:
- Module frame thickness range the clamps accept, e.g., 30–42 mm.
- Clamp width and the torque spec for the fasteners.
- Whether the mid-clamps fit your panel's frame profile, not just the module outer dimensions.
The surprise wasn't the price difference between suppliers when we ran our own compatibility test last year. It was how much hidden value came with the manufacturers who published this data in their brochure and enforced it in their configuration tool. The ones that don't make you chase engineering for a simple yes or no.
Check: Can I find the exact frame thickness range, or do I need to email for it?
4. Count Every Part in the Bill of Materials
Two mounting systems can look similar per watt and then diverge completely when you count components. A rail and a clamp is not a complete system. Ask for the full bill of materials for a typical array: end clamps, mid clamps, grounding washers, rail splices, base attachments for the roof or ground—oh, and the fasteners that connect the base to the deck or foundation pile. That last one is the sneaky line item people forget to ask about.
We had a customer compare our quote against a competitor's 'lower cost' system, only to realize the competitor's price didn't include grounding hardware. Adding it back in changed the installed cost by roughly $0.02 per watt. On a 100 kW commercial system, that's $2,000 in line items that conveniently disappeared from the brochure.
Check: Does the price include all fasteners, grounding, and splices, or are they listed as optional?
5. Estimate Installation Time Before You Compare Price
This is where I lean on the efficiency argument, because I've seen the difference in the field. A mounting system that looks expensive on a cost-per-watt basis often wins on installed cost—and installed cost is what moves your margin.
Count the fasteners per linear meter of rail. Ask how many tool types are needed to complete the assembly. Check whether splice bars come pre-assembled or get installed by hand on the roof. A system with twice the fasteners per rail isn't automatically bad, but every additional fastener is roof labor, and roof labor in 2025 is not cheap.
I want to say switching our own technical literature to include an estimated assembly time per component cut our customers' estimating time by maybe 40%—don't quote me on the exact number. The point is, when a mounting system is designed so the parts only fit one way, the installer doesn't stop to think. That's a competitive advantage.
For the record, this isn't an attack on traditional mounting methods. There's absolutely a place for highly adaptable racking that takes longer to install, especially on unusual roofs or retrofit projects with geometric constraints. But if you're putting a standard system on a standard flat roof, installation efficiency is competitiveness.
Check: Is there a published parts count or assembly time per rail or per meter?
6. Read the Warranty—and the Fine Print That Kills It
A '25-year warranty' is only 25 years if the document says so in language that holds up. Two things to look for.
First, what exactly is covered? Rails only, or also clamps, grounding washers, and fasteners? Accessory warranties are often shorter than the structural warranty, and installers only find out when they file a claim. Second, what conditions void it? Annual inspection requirements, restrictive torque specs, or approved-contractor-only installation clauses can make the warranty nearly useless if you don't keep records.
And if the brochure makes an environmental claim, same test applies. Per the FTC Green Guides, saying something is 'recyclable' or 'corrosion-free' needs substantiation. If there's no footnote describing the test method, ask for it.
Check: Does the warranty cover the entire system, and are the conditions realistic?
What We See Go Wrong
Three mistakes, in no particular order:
The rendering is not a drawing. Pretty isometric views often leave out critical details like rail splice positions, expansion gaps, or the direction of the last row clamp. Always ask for the DXF or Revit file. If it matches the rendering, that's a good sign.
Ballasted vs. penetrated is not a quality comparison. It's a site condition comparison. One is not inherently more premium. Using a ballasted system on a roof that wasn't designed for the added dead load is just as wrong as using a penetrated system on a roof that can't take the penetrations.
Corrosion claims without a story. 'Corrosion-free' needs a salt spray test reference and an alloy or coating spec. If the brochure doesn't name either, you don't actually know what you're buying.
One caveat: these checks work for standard mounting systems in common conditions. If you're sourcing for a massive utility-scale project with significant custom engineering needs, a brochure checklist won't be enough. Skip the literature and go straight to an engineering review with the manufacturer. For everyone else, the load table is still the best place to start.

Renata Silva
Renata Silva is a photovoltaic module analyst covering monocrystalline solar panels, bifacial modules, TOPCon and heterojunction designs, glass-glass construction, junction boxes, and module warranties. She interprets IEC 61215 and IEC 61730 evidence while comparing rated power, conversion efficiency, temperature coefficient, bifaciality, insulation, mechanical-load results, degradation assumptions, and tolerance. Her technical guides help EPC engineers, distributors, and project buyers separate qualification evidence from site-specific energy yield, climate exposure, installation constraints, and long-term performance risk.